To create a Named Instance in SQL Server 2008 R2, You need to follow below mentioned steps...
1. Go to your folder in machine where you have SQL Server 2008 R2 Setup files and file the setup.exe file this is executable file that is used to install SQL Server for you. Do right click on this file and select Run as administrator option from the appeared context menu as mentioned below in Screenshot.

2. the moment you executed setup.exe file one splash screen will appear for you. There, you can find multiple option like Planning, Installation, Maintenance, Tools, Resources, Advance and last is Options
By Default Planning option is selected on the screen. To create new SQL Server Instance you need to select Installation option...


18. In this step you send your report server error to Microsoft by selecting the check box on screen.


1. Go to your folder in machine where you have SQL Server 2008 R2 Setup files and file the setup.exe file this is executable file that is used to install SQL Server for you. Do right click on this file and select Run as administrator option from the appeared context menu as mentioned below in Screenshot.

By Default Planning option is selected on the screen. To create new SQL Server Instance you need to select Installation option...

3. In Installation option, You need to choose "New Installation or add feature to an existing installation." from the right panel of the screen.
once you click on this option one splash screen will appear as mentioned below..

4. once current operation is completed, New screen will prompt you to setup support rules..

Although, you can see all the details on the screen but in case of any fail you can see all details using button Show details >>. when you will click on this button you can see all the relevant details in appeared bottom section on screen.
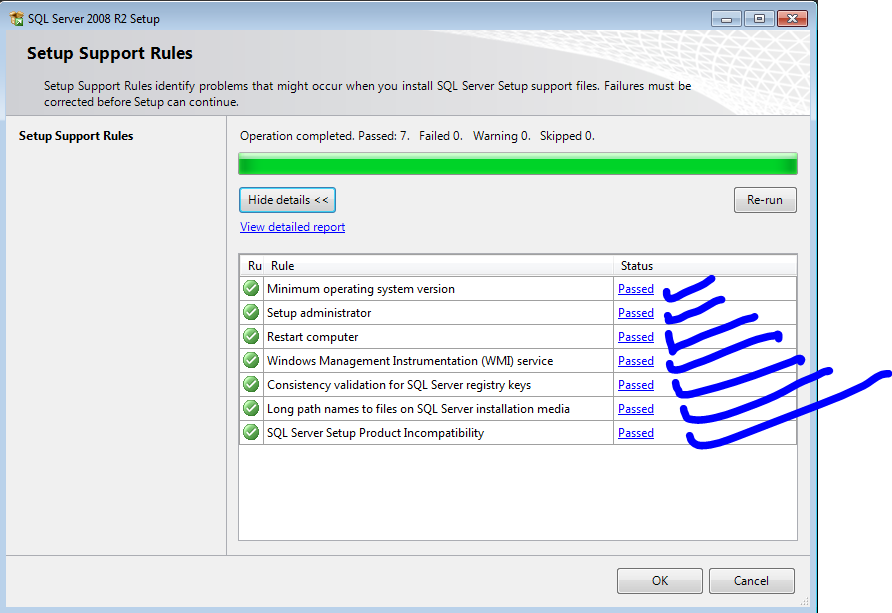
If all mentioned rules are passed click on "OK" button. on click of "OK" button again process splash screen will appear for you

In case of fail, You have to choose button Re-run to execute/Validate again..
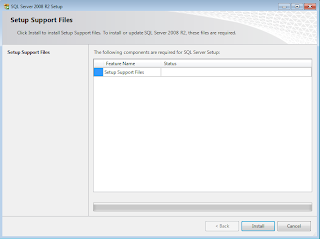
5. Now your setup is ready to install setup support files on your machine. Press Install button

You can check the process status as showing in below screenshot...

once process will completed you can see all the status in appeared screen. You should not worried about the warning if any.

So far, Everything looks good. I don't care about the warning..Thus, I'll go ahead and press "NEXT" button.
6. Here, You will get screen "Installation Type" Screen that will allow you to create new SQL Server Instance for you. You have to select option "New Installation or add shared feature" from the given option on screen. Press "Next" Button

7. In this screen, You need to provide you product key in given input area. by default, it takes from last installation.

Press "Next" button for next step...
8. In this screen you can find all the licence terms and conditions. Please read carefully and do accept for the successful installation.
Microsoft has given an option to send the feature usage information along with your hardware details to Microsoft.

9. Now you can setup the role for your instance in below mentioned screen
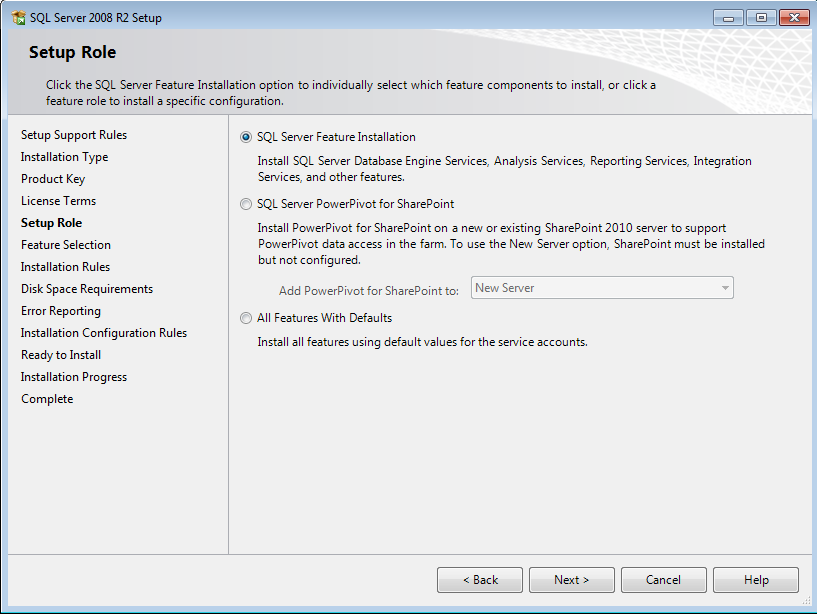
Press "Next" button
10. In this step you can select or deselect the feature the available features for your instance...

I have selected All and pressed "Next" Button. This will take few minutes to install features for your instance and will notify with "Please Wait" message So please bear with this for the minute..

11. Next setup screen is related to "Installation Rules". Here, i can see all the details with the help of "Show Details >>" button. check the details for the error. If failed count is zero then press "Next" button happily..

12. This is the main step that you need to take for creating new instance in installed SQL Server 2008 R2. Select option "Named Instance" from the given option and provide the name as per your wish for new Instance.

In my case i have given name as "MYSQL" and clicked "Next" button

13. The next step is related to your disk space requirement that is necessary to complete installation. you can see the details tin screenshot

Press "Next" Button from the bottom panel
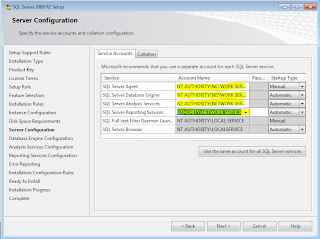
14. In this step you can configure your server. Here, you can setup the user account for the SQL Server services and can setup the collation for the Server.

You can select the account as given in list or browse for the another user account..
find the collation setting here you can customize according to your need..Collation you need to change in case if you want to provide support for other language/special symbol those are not supported by current collation..
click on "Next" button after configured your Server for the created instance..
15. This step allow you to use SQL Server in Mixed mode authentication. here you can provide your password for the administrator user for created instance and add current user as a administrator in instance.
Press "Next" button
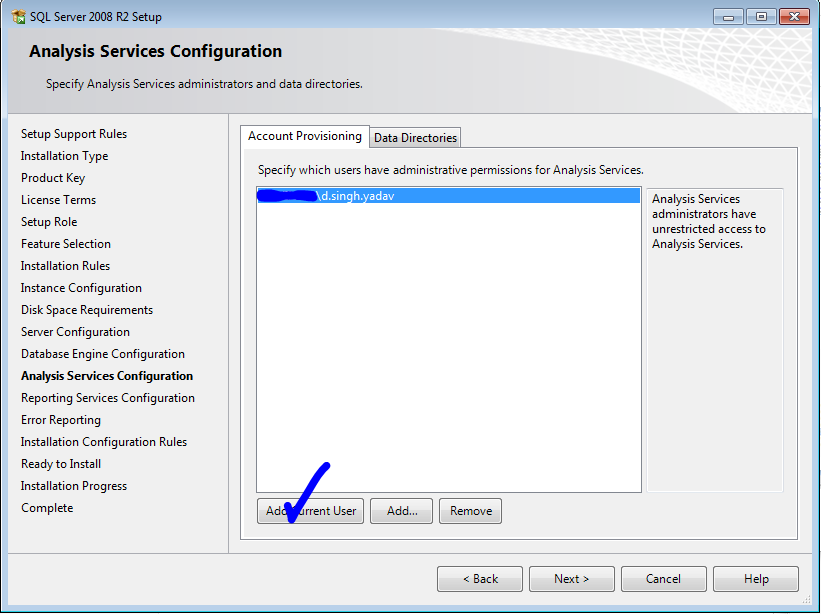
16. Setup the Account for the Analysis service in Instance in this step and you can add default/current user
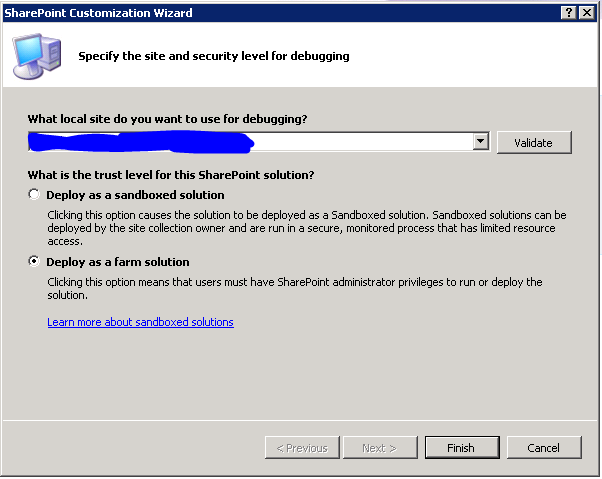
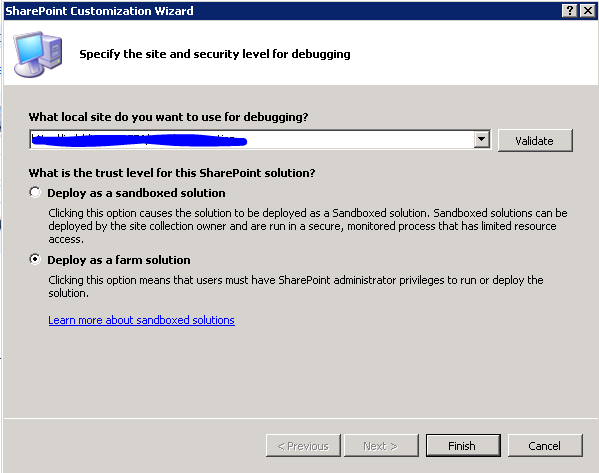
17. You can do reporting service configuration in this step. If you don't have anything specific for the reporting section then you can choose native/default selected option.
To integrate reporting service with SharePoint you can use second option from the given.
and if you want to install only and don't want to configure select third option.
18. In this step you send your report server error to Microsoft by selecting the check box on screen.
Press "Next" Button
19. In this section of installation, You can setup installation configuration rules..for more details click on "Show Details >>" button.. You can find details in below area of the screen ..
press "Next" button
20. Ready to Install SQL Server 2008 R2. click on "Install" Button

21. Now your installation will start after setting up all the configurations, roles and settings. Now you have to wait till the complete step.

22. After long waiting time, Your installation completed and you will happy to see below mentioned
screen in front of you.

23. Now you can go to start and run SQL server management studio as Run as administrator
24. Click on "Connect Object Explorer" one dialog box will prompt you to setup your
- Server Type
- Server Name
- Authentication
provide the details in given input area and click on "Connect" button.

25. You will be happy to see your new instance this moment. Here you can create databases, Setup user accounts and more ...
I would like to thanks everyone who has go through this blog. Please provide your valuable feedback about the blog..
Thanks again :)


